
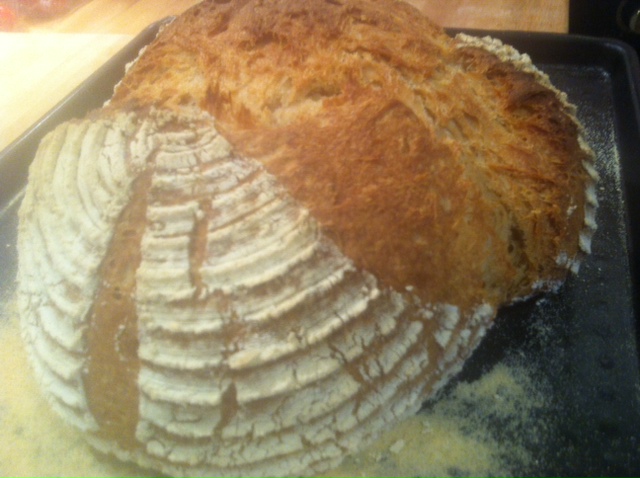
Freshly baked home made bread
Bread. I love the stuff. But it’s the real stuff that I love, the sourdough, the slowly-risen loaf. It doesn’t seem right that commercially produced highly processed loaves, made by the intensive Chorleywood process can even be called by the same name. They just are not the same thing. So, the greatest thing sliced bread is…. unsliced bread. Naturally.
Rant over. Probably.
Bread. When I think of eating bread, I think of friends, of sharing it, of tearing off great chunks and dipping it into olive oil & balsamic vinegar, of making slices of toast and spreading them with butter and marmite. And sometimes peanut butter too. Of my father, sitting at the head of the table, and cutting the bread, then spearing the slice on the point of the bread knife to pass it to your plate.
And all this sharing with friends is appropriate: the word companion literally means ‘with bread’ from the Latin ‘com’ (with) and ‘panis’ (bread).
I’ve been a baker for years, but most of my baking was biscuits and cakes and scones and traybakes, basically things without yeast. And then we started using the bread machine. Unlike many bread machiners, we used it 3 or 4 times a week, and with a bit of trial and error, and the purchase of some super-tasty stoneground flour, we started making really amazing loaves. I occasionally made a loaf by hand, but not so often.
I bought lots of books, made sourdough starters, killed sourdough starters when I forgot to do anything with them. And replaced the bread machine, three times. (Yes, we used it so much we wore it out).
And then I bought the best bread baking book: James Morton’s Brilliant Bread. He writes easily. Or perhaps he doesn’t, but it reads easily. His explanations make sense, and help you understand why you are carrying out each process. And he starts you off with the easiest bread in the world – it needs no kneading. It takes up so little of your time to make it. And it tastes delicious.
I’ve adapted it slightly, to make use of my sourdough starter, which gives it a wee bit extra flavour and chewiness, which I like.
A few things before we start:
- this recipe requires NO kneading. It is easy peasy. You have no excuses not to make it
- buy a set of digital scales. They aren’t terribly expensive but they will repay you every time you use them, and quite possibly will change the way you bake (in that you can weight things directly into any bowl or pan, rather than into the bowl provided with the weighing scales)
- use the biggest bowl you own; if you don’t have a really big bowl, consider buying one
- procure a shower cap – the ones you get free from hotels are fine, in fact perfect. Using this, and re-using it over and over again, is much more sensible (and easy) than using cling film

After proving, ready to bake
There are other things you might want to buy if you really get the bread-baking bug, but wait a while to see if you get it or not. Otherwise you’re going to end up with an unused proving basket in your cupboard, which will just annoy you (instead of giving you these lovely ‘flour rings’ on a loaf).
The best white bread (and it’s easy)
- 500g strong white flour (I use a stoneground from Bacheldre Mill, it’s lovely and comes in big 16kg bags if you get the bug!)
- 10g salt (see why you need digital scales)
- 7g dried yeast
- 330g tepid water
- a good dollop of sourdough starter (about 50g)
- Put the flour in a big bowl
- Add the yeast on one side of the bowl
- And the salt on the other
- Keeping them on their own sides of the bowl, mix them in with your fingers and then make a slight well in the middle
- Pour in the water, and add the big dollop of sourdough starter
- Now, using your hand like a paddle, mix all the ingredients together, until they are all combined
- Cover the bowl (with a shower cap if you have one, with cling film if you don’t) and leave it for about half an hour
- Go off and do something for a while; I recommend watering your tomatoes in the greenhouse, if you have any. Or reading the magazine section of the Sunday paper
- Now, take the shower cap off the bowl. Wet your hand under a tap, and keeping your hand a bit like a paddle, put your hand under one side of the dough and scoop it up, folding the dough over itself.
- Twist the bowl a quarter of the way around and do this again. Repeat several times, going all around the bowl, and round again. You should notice that the dough feels much smoother, slightly silkier than it did half an hour ago.
- OK, once you’ve got it back in a nice wee lump in the middle of the bowl, pop the shower cap on again and leave it for a couple of hours at room temperature.
- Just get on with your life, and ignore the dough.. it’ll do its doughy thing quite happily without your interference or worry.
- This time you’re going to need a wee bit of flour and either a proving basket (if you’ve got the bug) or your baking tray. Prepare the proving basket / baking tray by dusting it with flour. Dust your table or board with flour too.
- Now scoop the dough out of the big bowl onto the floury surface. You’ll see that there are lots of bubbles within the dough and that it feels a bit like a balloon full of water, sort of squishy, but not really squishable.
- Try to work relatively quickly with the dough… Make it into a sort of brick shape, and then pull it at each end and fold those ends over into the middle, and squish it down a bit. It might be a sort of round-ish shape now. Squish it in the middle and pull it at the ends to make an oblong brick again. And pull those ends out and over into the middle again to make a round. Do this another couple of times if you want, or not if you’re bored by now.
- Place your dough on the baking tray (or into the proving basket) – either make it a nice round ball shape, or a sort of oblong.
- And walk away and leave it, for an hour or two, depending how warm your room is (the warmer the room, the less time it should be left). The dough is now ‘proving’ which just means that it is rising again – the wee bubbles in the dough are expanding and the gluten in the flour is nice and elastic now, so it’s stretching, and holding those bubbles in place. You want the loaf to almost double in size, but don’t fret if it hasn’t
- Heat your oven to GM7 / 425F / 220C. And when I say heat it, I mean switch your oven on a good 10 minutes before you pop the loaf in the oven, to make sure the bread goes into a properly hot oven. If you want a scrummy crust, put a dish of water in the bottom of the oven, to create some steam.
- Before you put the bread in the oven, cut a slash in it, which will allow it to stretch as it rises again in the oven. For a round, you can just do a cross on the top, and for an oblong try a long cut down the middle and then diagonal cuts on each side, like a leaf, or a feather. The cut doesn’t need to be deep, just cut through the skin of the dough.
- Bake for about 40 mins.
- Place on a baking tray once it’s cooked, and try not to slice it and eat it till it’s cool.

Some loaves are unpredictable shapes
Top tips
- Complete up to stage 11 in the evening, and then pop the dough in the fridge with its shower cap on. It will be quite happy overnight in the fridge instead of 2 hours at room temperature. The next morning, start from step 13.
- If you have a proving basket, use a really liberal dusting of flour before you leave the dough to prove in it. Once it’s proved, turn it out onto the prepared baking tray, and slash its top and pop in the oven.
- Use semolina or polenta instead of flour on the baking tray
- Increase the volume of sourdough starter, and reduce the water slightly
- Don’t worry about timings at all – if it’s left for 4 hours instead of 2 it will probably be fine
Want to see more recipes? What about making some lemon curd to spread on your home made bread? Or imagine how good it would be with home made chicken liver pate?
All my recipes are here: SheWolfInTheValley.


3 Responses to “The greatest thing since sliced bread…”