Let me tell you, Aunt Lilo’s apple cake is delicious and super easy to make. Try it warm with a wee dollop of Greek yogurt.
Although this feels like an Autumnal recipe, perhaps it will be just perfect for using up a couple of apples which are most definitely past their best. They’ve been lurking in our fruit bowl for just too long.
I feel a bit like those apples, as though I’ve been sitting around doing not very much for far too long. Perhaps my time to shine is about to come?
I’ve not been well for a few months, and it’s fair to say that our house move was not as straightforward as we might have wished. However, perhaps it’s the Spring in the air, but I really do think that I’m beginning to feel a whole lot better. I still can’t drive, due to the big blindspot I have in my left eye. And I still have a permanent headache. But honestly, this feels like good health compared with how I’ve felt for months.
Anyway, let’s go see what we can do with those slightly soft apples. And after that, there will be lots more wild garlic pesto to make. Such a good harvest this year. Top tip if you’re making wild garlic pesto – play about with it, make it how you like it. We made a batch with Bonnet goats cheese the other day and it was stunning. And we regularly add a chilli pepper to give it a bit of zizz.
***
Thank you for reading this.
Mostly I blog about my relationship with Mum and her dementia, so if that might be your thing, then you could start here at Taking smock of the Situation. Or just dip in. After all, if I’ve learned anything this last few years it’s that chronology and time are less important than we might believe.
Do get in touch if you have any questions or comments – I love to hear from you my lovely readers.
More clothes pegs on a line. They maybe don’t look much like clothes pegs but they are, and I kinda like them. They might make more sense once the swallows are there too.
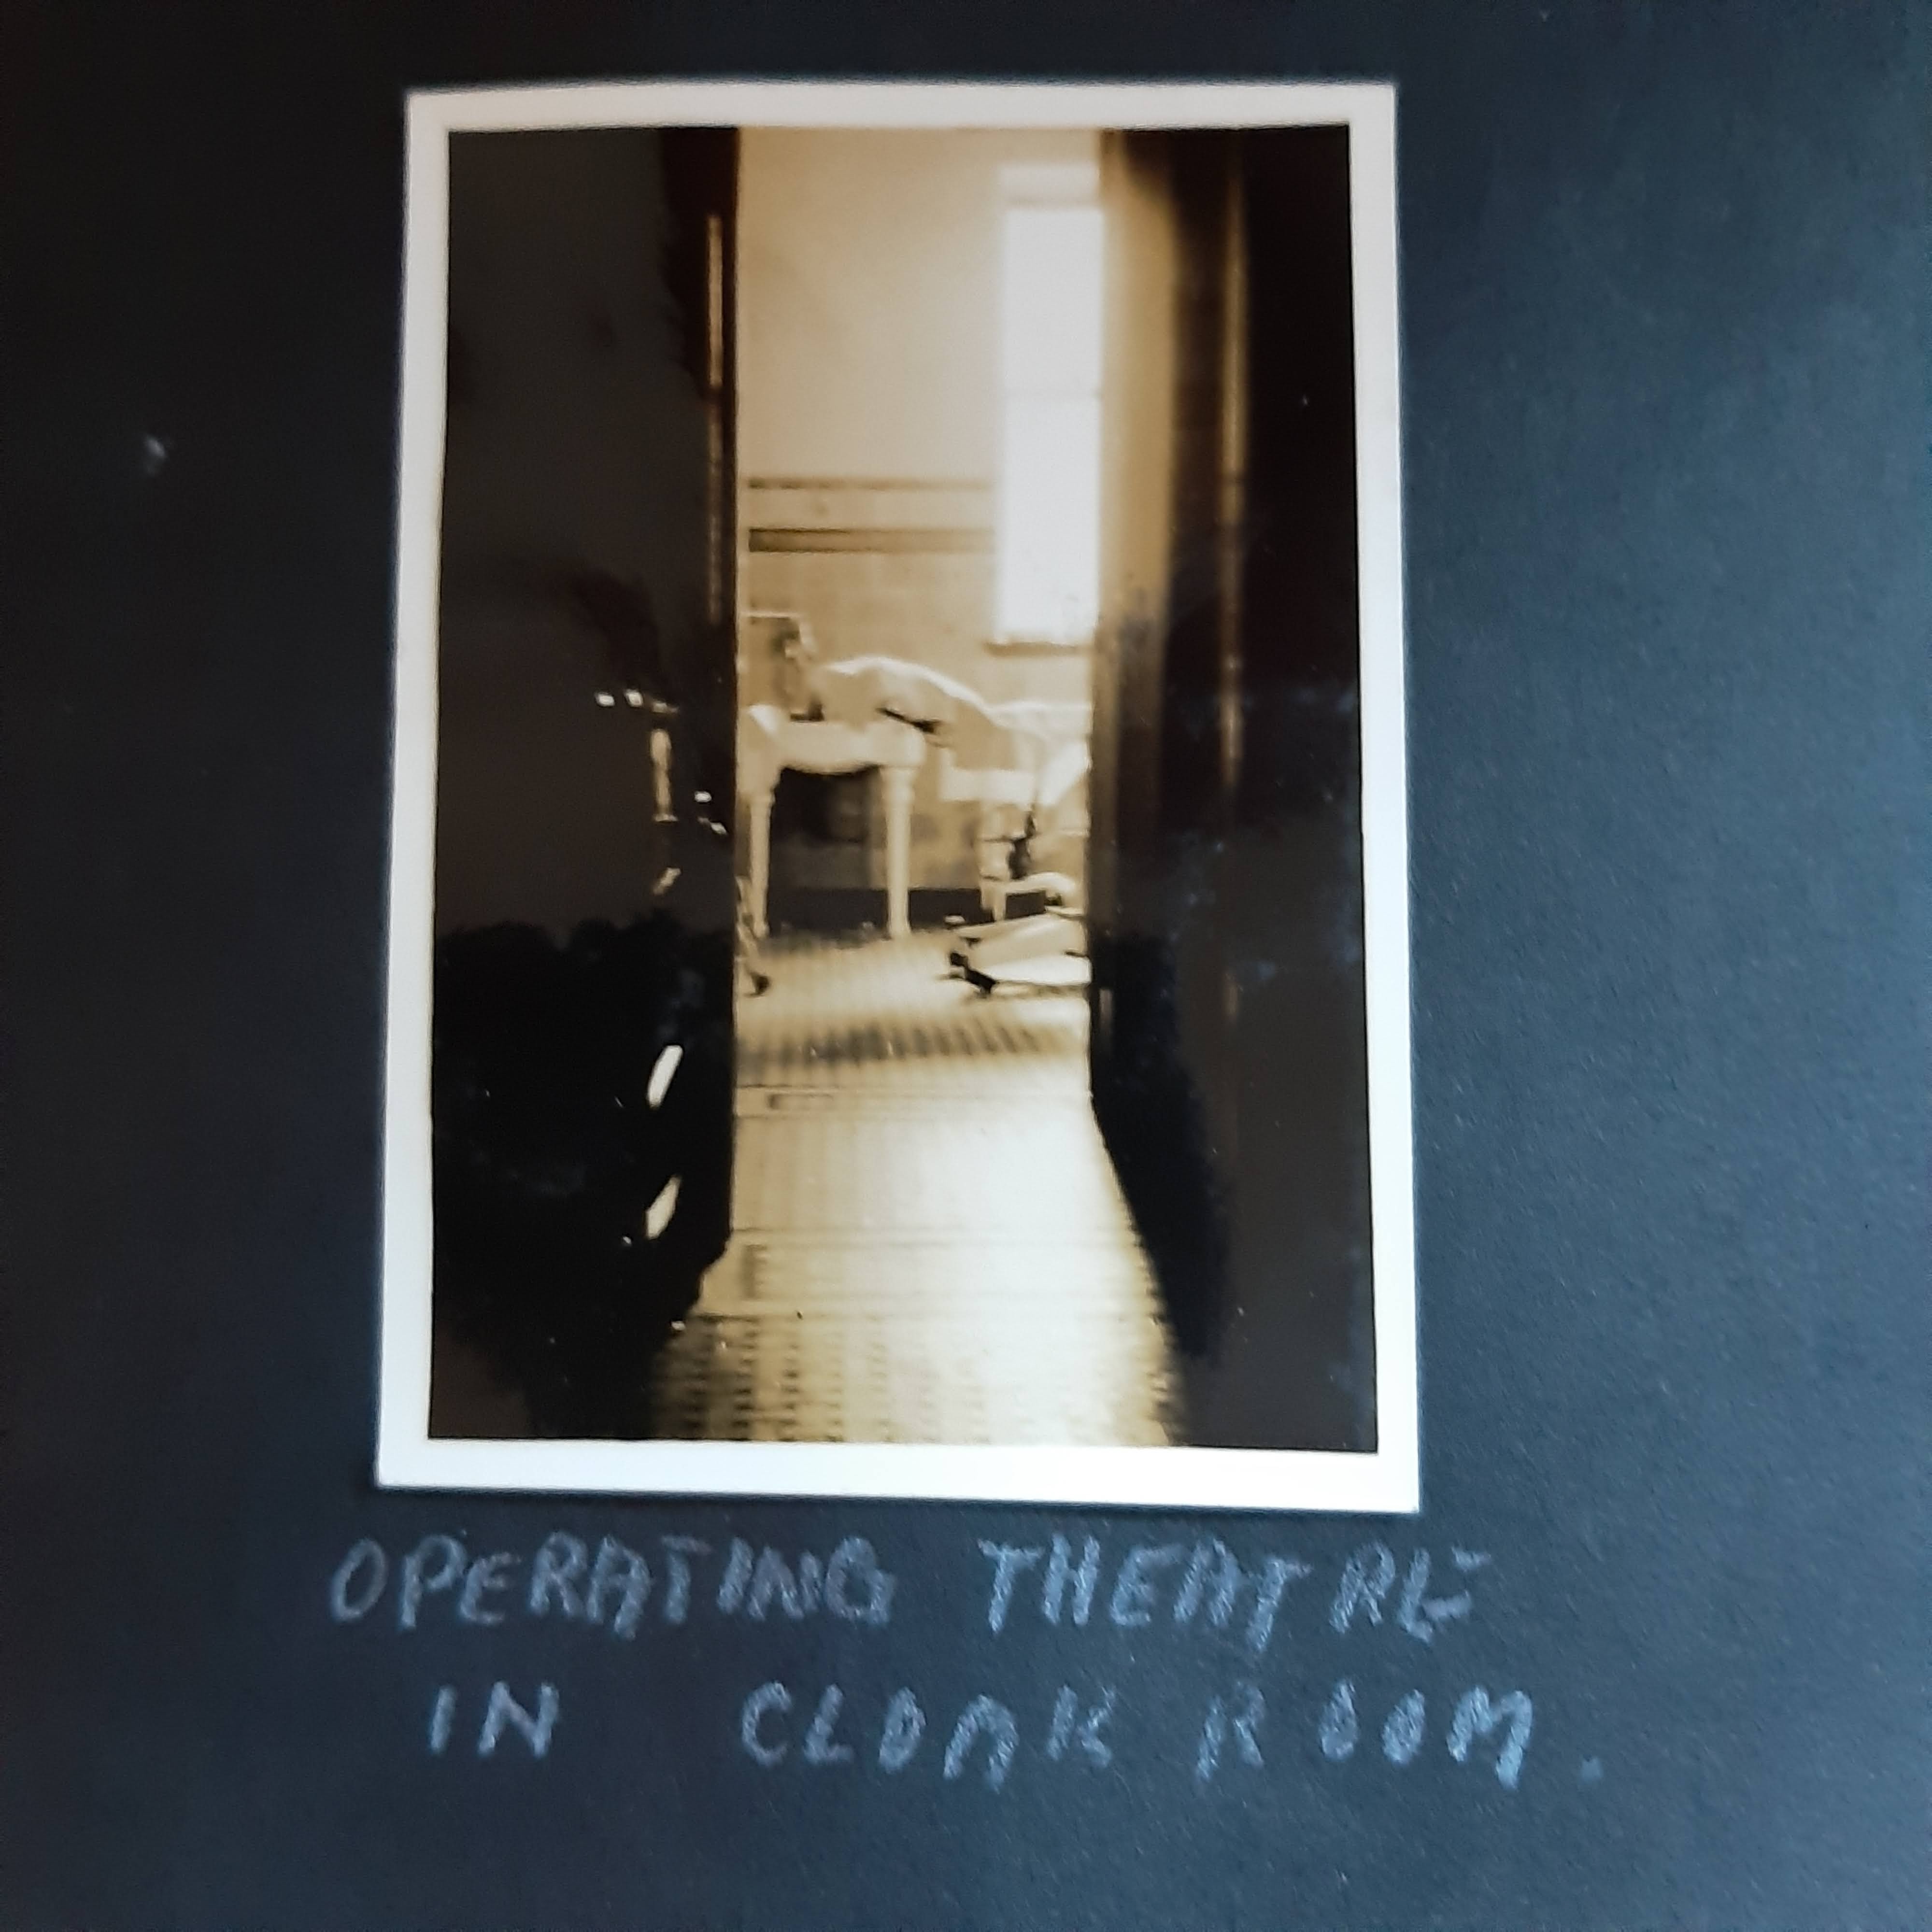
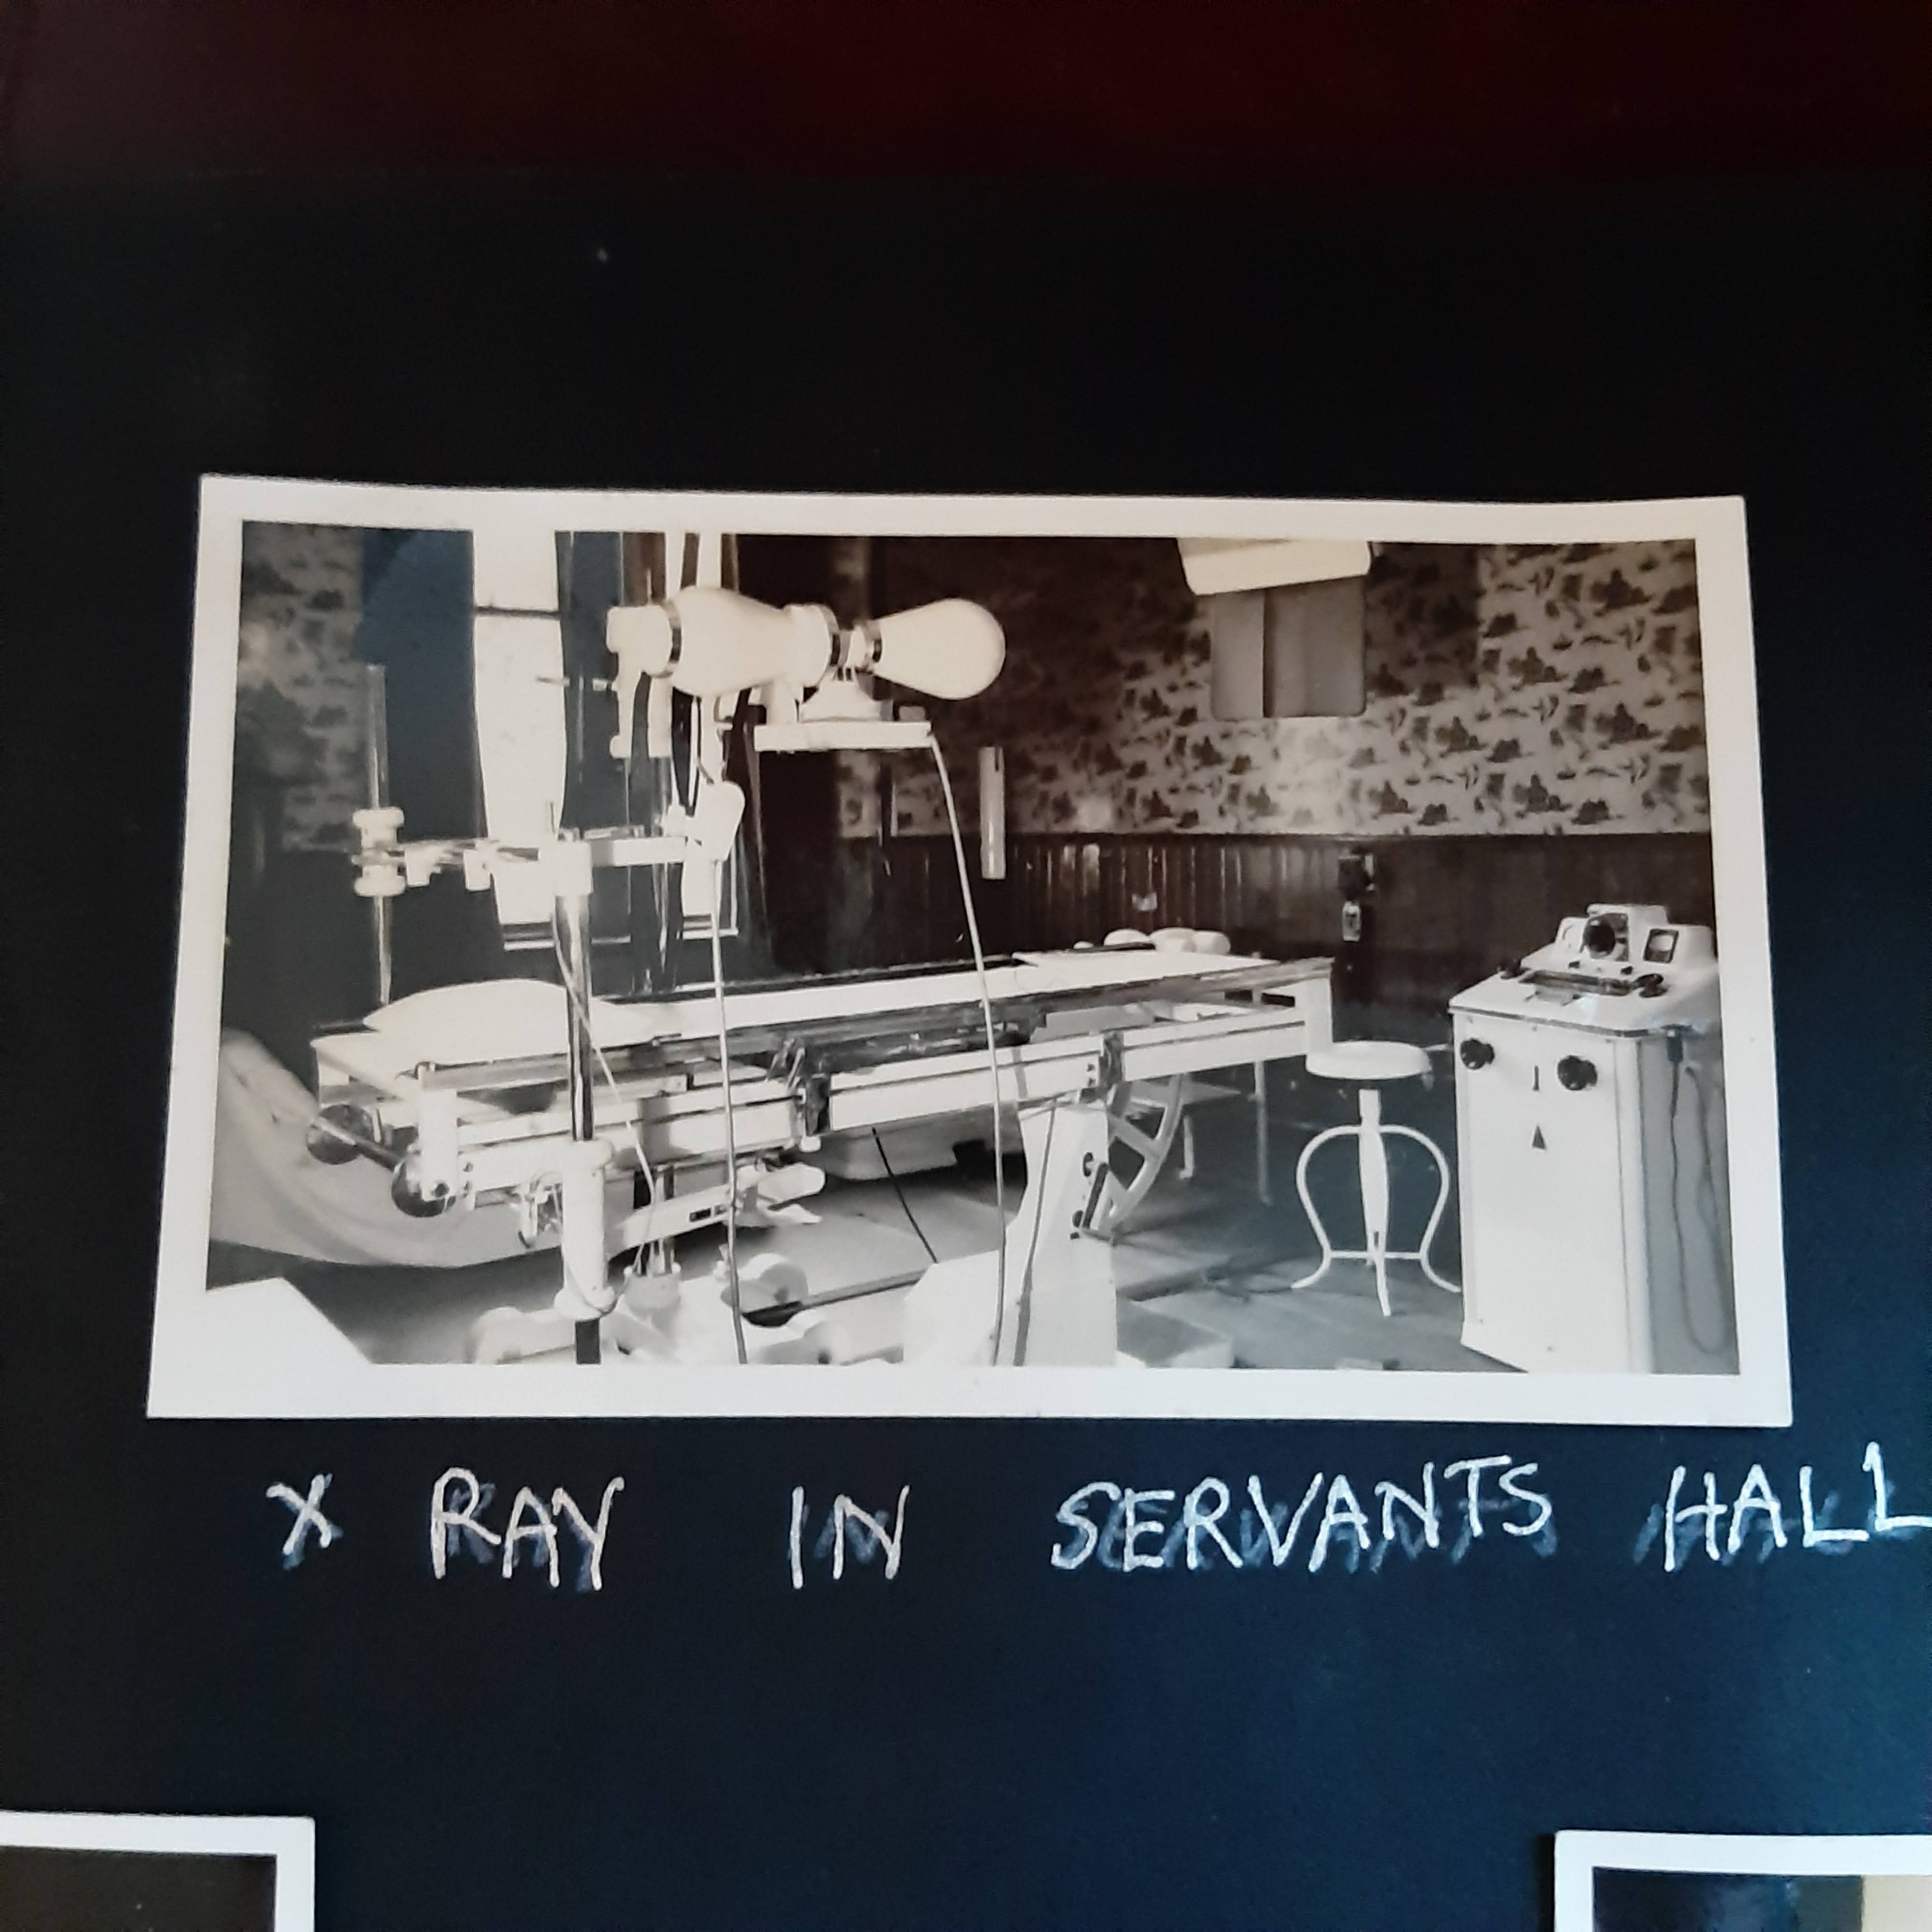
The bonus picture today is of the Duncan siblings, taken on the steps of Newlands during WW2. They all feature in Mum’s memoirs in different ways, but the biggest character is Newlands itself.. it was given to Norwegians during the war, to use as a hospital, while Gran lived in the Garden Cottage with her daughters, Jen and Mum. But more on that another day.
The Duncan siblings: Arthur, Loïs (my Grandmother), Walter, Lorna and JohnNewlands as a hospital, during the war
Mum was proud of her connections to Norway, first developed on her long journey back to Scotland at the start of WW11. On the ship were only a few passengers, and it seems that they were mostly Norwegian whalers, heading back to Europe to fight. Our Grandmother had a particular and long-lasting friendship with one, Kris Thoresen also known as Big Dog.
And Mum remembered with great fondness the young recuperating Norwegian soldiers who climbed trees with her on the Newlands Estate during the war. When she jumped into a large water tank and cut her foot (almost in half by all accounts!) on a broken jam jar at the bottom of the tank, she was carried up to the Big House which the Norwegians had turned into a hospital during the War, and there the kind Norwegian surgeons sewed her foot back together and the nurses bandaged it up.
In 2017 Mum contributed to a local project, gathering information about the connections between Dumfries and Norway from WW11 and beyond. The project is now all compiled here: Our Norwegian Story. There is oodles of information on the site about the many and varied ways that the Norwegians and the Doonhamers engaged with one another, including a section on Newlands (click through on the locations, and then on Newlands).
There were Royal visits to Newlands, by King Haakon in the 1940s and then King Olav in the 60s. As Mum’s mind started unravelling she became slightly obsessed with King Haakon, and with the plaque he unveiled at Newlands – she would suggest that we went for a visit to see the plaque, because no-one else would know about it any more, only her. There were days I would visit and she would tell me that he was coming to tea the next day, or that he had been there earlier, and now had thrown all his rubbish into that pile ‘there’ (pointing at the corner of the bed, where she regularly claimed there was a rubbish dump).
One of Mum’s other obsessions (for a while) was biscuits. She LOVED to have biscuits in her tin. And as fast as I could bake, and fill up that tin, they would all be eaten again.
And then I found a recipe for King Haakon biscuits! The joy! Of course I made a batch and took them to Mum, who declared that they had probably been made specially by the cook at Newlands, and that cook got the recipe from the King. I took that as praise indeed for my biscuits.
The biscuit recipe actually came from the WI Biscuit book, which is an absolute must for anyone who vaguely likes making biscuits.
And now I have a batch of the biscuit dough in the fridge, ready to be cut into slices and baked, so soon the kitchen will smell deliciously of sweet baking.
Do let me know if you make King Haakon biscuits. Or if you want the recipe for the Cardamom Cookies, which are sensationally good. One of these days I’ll get back to writing up more recipes again.
***
I started writing this series of posts here, with Taking Smock of the Situation, an embroidery project I started after I realised Mum might have dementia. There I was, embroidering her old fisherman’s smock with symbols relating to her life; while her memories were slipping away, like me at a party I don’t want to be at.
Before that I blogged about whatever I was cooking and you can find my recipes here.
It’s been hard hasn’t it? This last year, being locked down, missing being with the people we love.
At the beginning of January this year, I went to stay with Mum, to mind her as she gets increasingly frail and somewhat confused. I knew I might be there for a while, and with the latest version of lockdown I didn’t know when I’d be allowed to see anyone else, nor how long I was likely to be there. It would be lonely, isolated. So I put a lot of thought into my own well-being and self-care, and tried to really think about what I could plan that would give me pleasure, that would nurture me, keep me on an even keel, when I knew I would feel cast adrift from the world I usually inhabit.
Most people who know me would assume that baking and cooking would be high on that list, and I thought so too initially. But it didn’t take me long to realise that the joy I gain from baking is mostly from sharing what I make. I got so little joy from baking for myself (partly because I have successfully lost over 2 stone and don’t intend to pile it all back on for the sake of some baking self-care). For a while I hardly baked at all.
Then I started making biscuits again, and posting them to people – biscuits, I discovered, are very post-able. And there was a surfeit of post-able boxes available after all that online shopping that had been going on!
But then the first pink forced rhubarb arrived in our fruit and veg box, And I knew exactly what I wanted to make – a sort of rhubarb frangipane tart. Well, the pastry was going to take too long (I only seemed to have short slivers of time available) so I made a cake without the pastry. It was amazing. But oh so ugly.
I made another. Just as tasty, just as ugly. It was christened the Ugly Duckling Cake.
Ugly Duckling Cake, in all its glorious ugliness
Then I discovered the muffin tins in the cupboard … at around the same time as I used up all the rhubarb. How could I replicate that sharp shock of rhubarb in a wee frangipane cake? My first thought was cranberries in balsamic vinegar (this may seem like a very random thought, but I had spied a bag of cranberries in the freezer, left over from the Christmas That Never Happened, and a couple of years ago I had made a delicious sharp and sweet cranberry and balsamic chutney, which was just the taste I was looking for). I’ve also used marmalade, and lemon curd. I reckon almost any kind of compote, made with whatever fruit is seasonal would work.
Oh, and the best thing about these wee cakes? If you pop them in a ziplock bag and put them in a suitable box, they post really well. You can send them in lieu of a hug to anyone and everyone you love. And you’ll feel so much happier having done it.
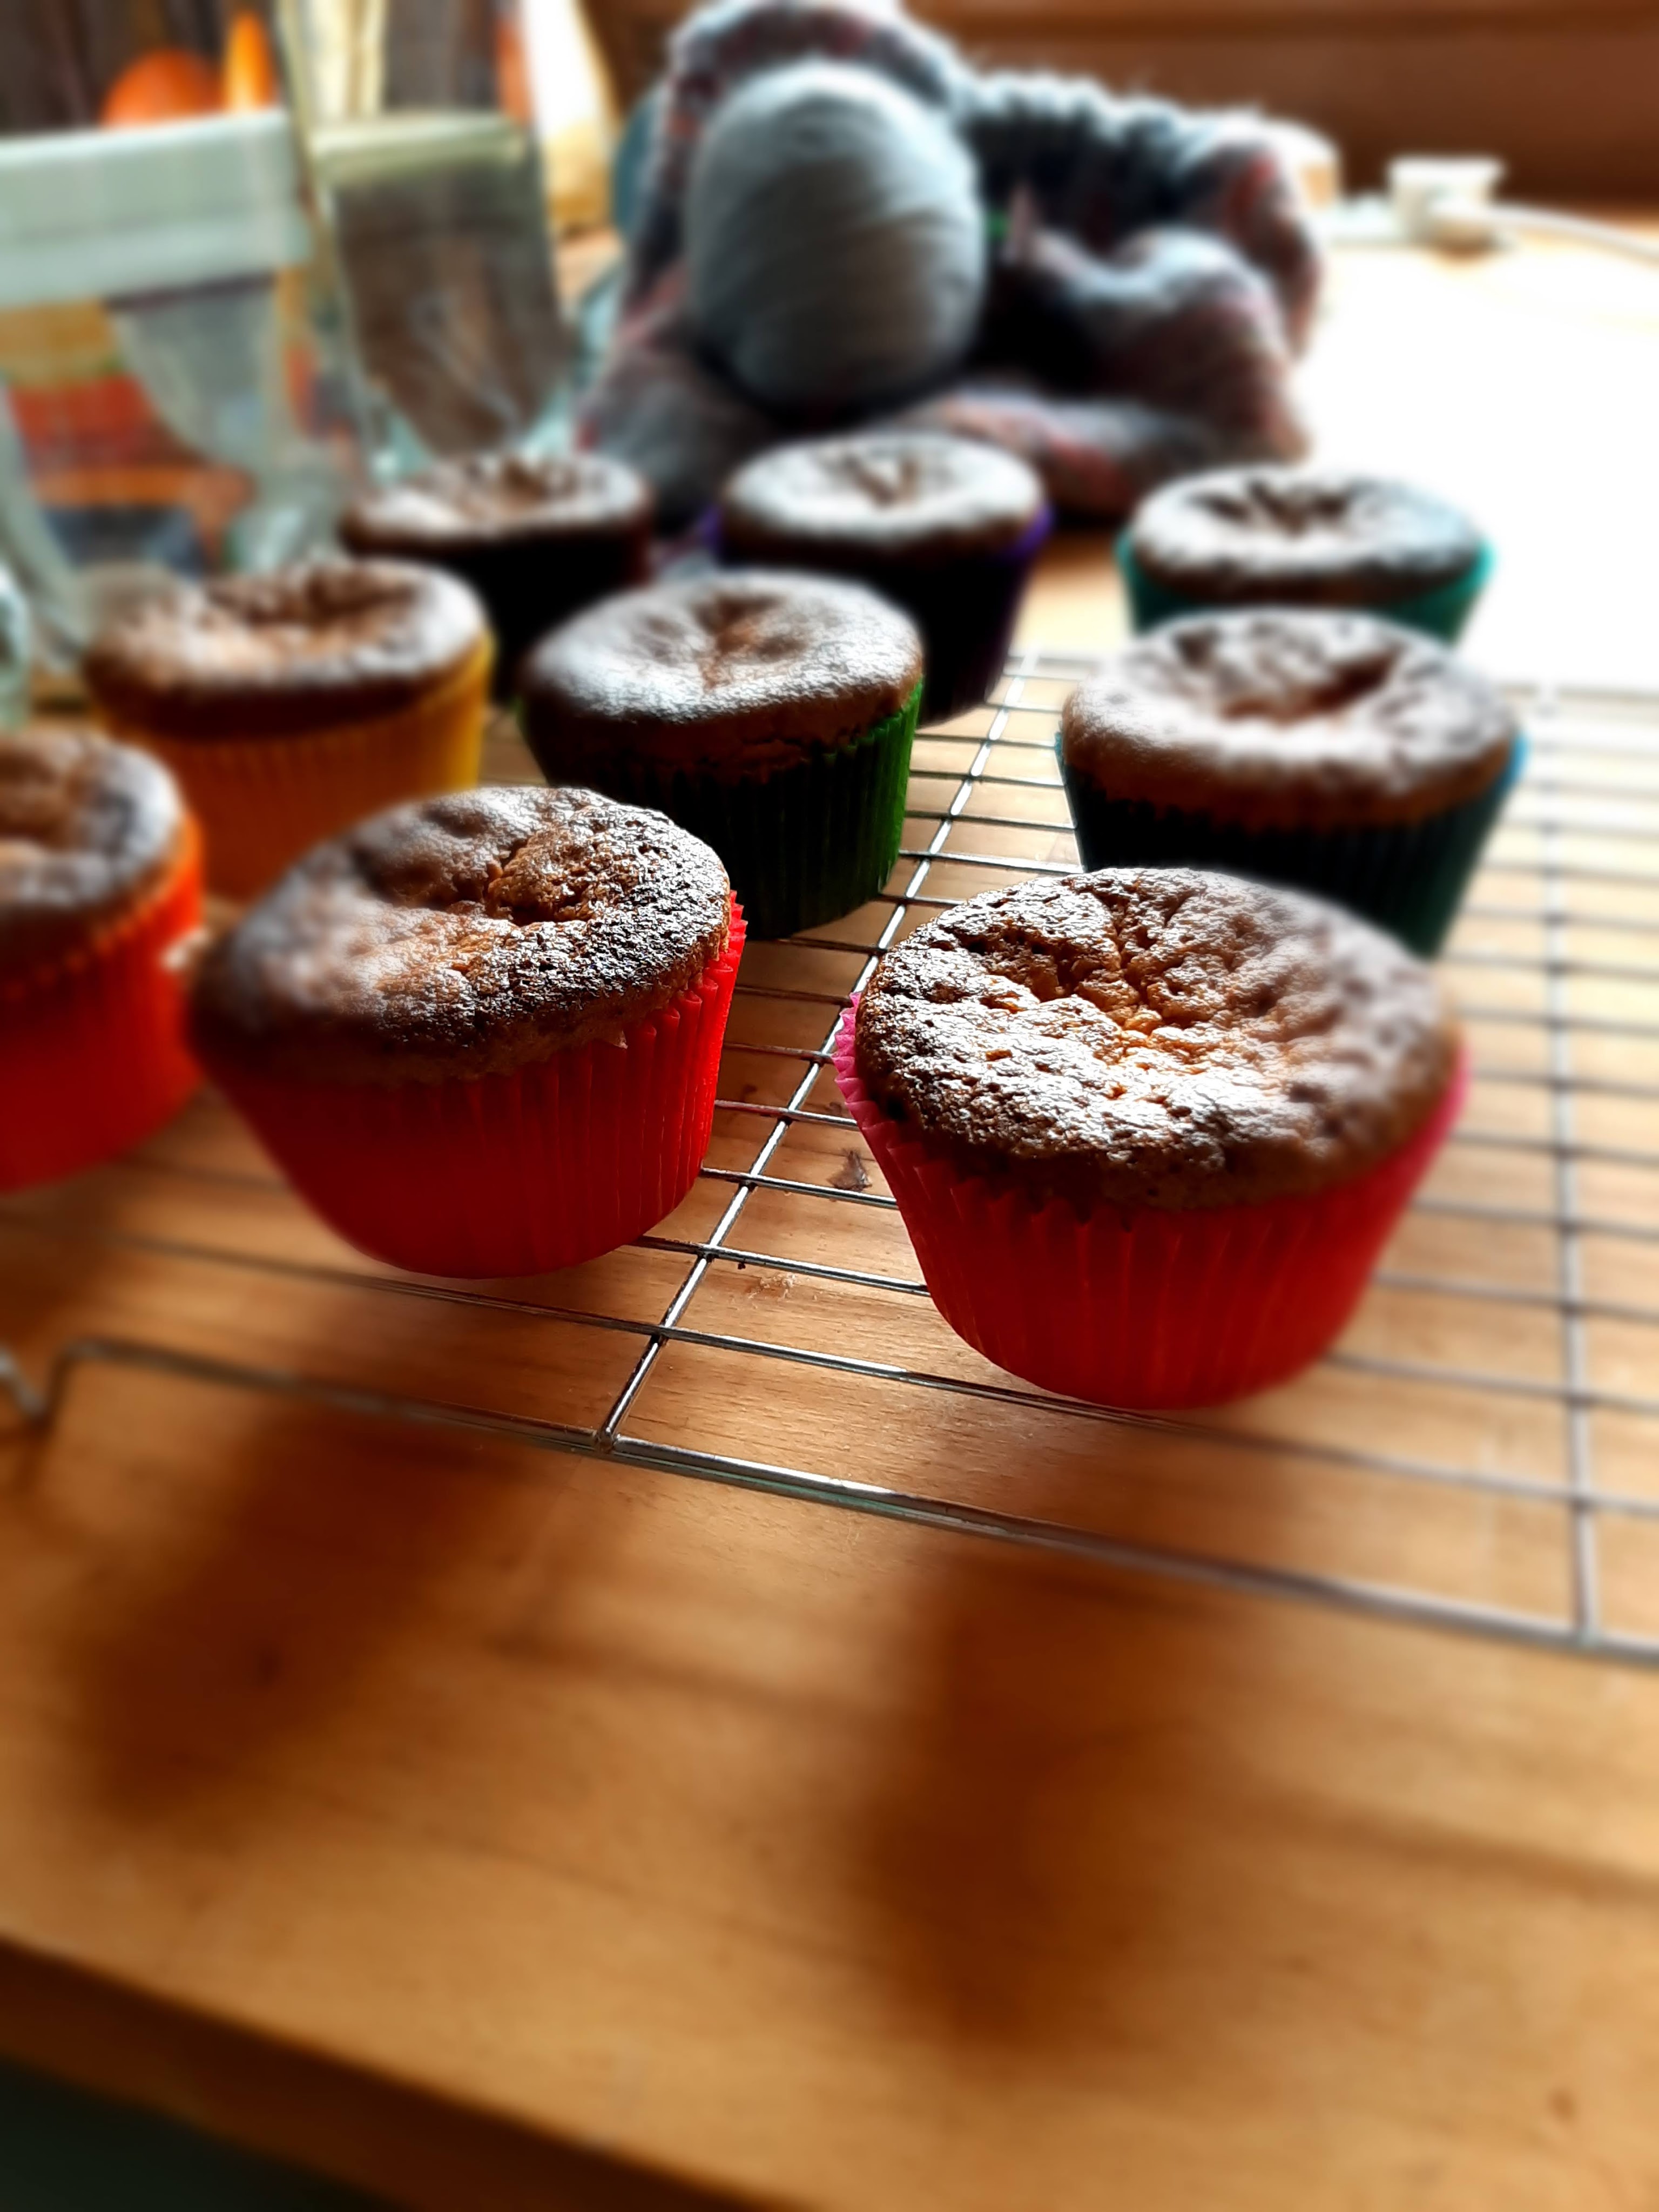
Well-fired frangipane cakes in rainbow muffin cases
Frangipane cakes
125g butter, softened
125 caster sugar
2 eggs
125g ground almonds
1 TBsp plain flour
Preheat oven to Gas Mark 5, or 170C.
Prepare your muffin tins. You know that this just means pop a paper muffin case into each of the muffin holes don’t you? I usually make 9 wee cakes out of one batch, but it depends on the size of your muffins, obviously.
Weigh out your almonds and add spoonful of flour. Set aside for a minute.
Using and electric beater, beat the butter and sugar together till really light and creamy. Then beat it some more. Seriously, the better you beat it at this stage, the lovelier and light your cakes will be.
Add the eggs one by one, beating well after each one. Add a wee bit of the flour/almonds if it is curdling to try to bring it back together. If your eggs are really fresh I think it is less likely to curdle or split, but perhaps I’m just imagining that?
Now, using a big metal spoon, fold the almonds and flour in to the mixture. Try to keep it light, don’t bash all the air out of it.
Spoon dollops of the mixture into muffin trays, using about 2/3 of the mixture.
Now put a spoonful of whatever fruitiness you are adding on top of the mixture in the muffin tins. And then cover with a final wee spoon of cake mixture. You really don’t need to be precise about all this, and in fact it works fine if you spoon all the cake mixture into the tins, and add the fruitiness on top at the end. You find this out by forgetting to leave some back one time.
Pop them in the oven. Check them after about 30 minutes to see how they are – I’ve had some ready at about 35 minutes, others needing another ten minutes. I guess it depends on your oven doesn’t it? I test by pressing lightly on a cake with two fingers, and seeing if it springs back nicely. If not, cook it a bit more.
Ready for baking
In the oven
Mini frangipane cakes, ready to be packed up and posted off as a proxy hug
You can pimp this basic frangipane mixture by adding other flavours, such as vanilla essence, almond essence or orange oil (I was gifted some of this elixir by a super-kind friend and it is amazing) – I mix it in with the butter and sugar.
If you want to make the lemon version, you can find my lemon curd recipe here. The balsamic cranberries can be found here. Or use a bought jam, or fresh berries, or slices of poached pear on top, or apples cooked in butter and sugar to caramelise them. Really, whatever you have to hand, just try it out. What’s the worst that can happen?
If you are interested in more recipes that I’ve scribbled down over the years, take a look at my Index of Recipes. And if you find any broken links, please let me know – over the years I have moved this site and some of the links I think are historic (and not in a good way).
I keep hens, more hens than is entirely sensible, and some weeks they lay an average of 7 or 8 eggs a day. This means that I never need worry about not having something to eat for supper – poached egg on toast is a popular midweek standby, as is a frittata, tortilla or omelette of sorts. I now regularly throw an egg into a cheese sauce as I make it, to give it extra richness, or quickly make mayonnaise just because I have some spare eggs kicking about.
In the pre-Covid Era I took eggs in to work for colleagues to enjoy, but that’s not possible now we are all in lockdown. Last week we offered a delivery driver a half a dozen eggs and at first he looked quite affronted, and said no he was doing alright just now, just managing thank you very much, and they’d managed to do a shop that week. I had to tell him they were laid that morning, from our free range hens, and he would be doing us a favour. He took them, I hope he enjoyed them.
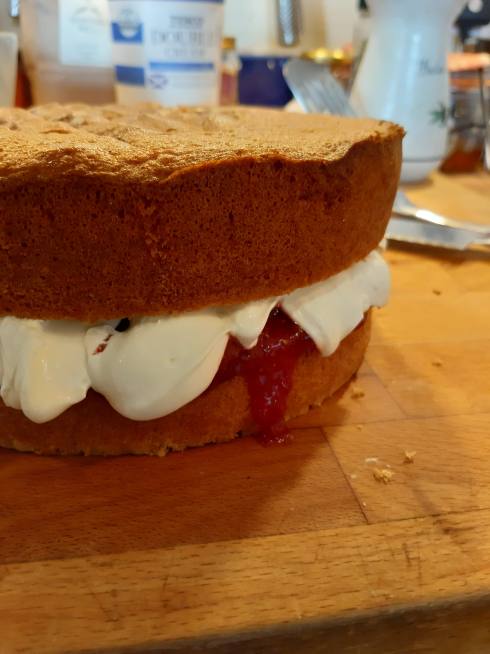
But there are lots of other things you can do with eggs, including the miraculous Genoise sponge cake. It really is a magical creation – just eggs, sugar, plain flour and a wee bit of butter, but combined in such a way that it creates a properly light as a feather sponge cake. And of course you can pimp it however you want, you could swap out some of the flour for cocoa, or add citrus zest to the batter, or brush over a flavoured sugar syrup once the cake is cool. But I’m jumping ahead of myself, let’s just make the basic perfect light Genoise sponge today, and fill it with clouds of whipped cream and some fresh strawberry jam.
Genoise Sponge Cake
Ingredients
I’ve kept the ingredients weights in Imperial because they are so deliciously simple to remember, and it’s how I make it. Sorry if you prefer cups or grams, but on this occasion I’m not doing equivalents.
4 eggs (obviously I would suggest using free range really fresh ones, but honestly use whatever suits you, probably medium/large in size)
4 oz caster sugar (use vanilla sugar if you have any)
4 oz plain flour
2 oz butter
Method
Prepare your tin or tins. Ideally you would lightly grease the tin and line it with baking paper, but you could probably get away with lightly greasing and then sprinkling with flour (then give it a shake to evenly spread the flour around the tin, creating a non-stick layer). You can use two sandwich tins, or a springform 8″/20cm tin.You know what, you can use whatever tin you’ve got, obviously! It makes life easier when you’re getting the cake in and out of the oven if you place your tin/s on top of a baking sheet.
Preheat your oven to Gas Mark 4 / 350F / 180C
Melt your butter and then leave it to one side as you do everything else so it cools a bit.
Crack the whole eggs into a big bowl, and add the caster sugar.
Using electric beaters, whisk this until it becomes thick and luscious, you’re looking for what is technically called the thick ribbon stage. This means that when you lift the beaters out, and leave a trail of mixture in the bowl, the trail holds its shape. I use handheld electric beaters at their full power, and it usually takes about 8 minutes to reach this stage. Remember, if the trail doesn’t hold, then there’s no chance your cake will hold its sponge in the oven, and you’ll end up with a pancake.
Now find yourself a large balloon whisk. Don’t have one? Use a large metal spoon instead.
Sift the flour into the eggs in three batches. After each addition, fold it in really gently, you’re looking to incorporate it into the light egg mix without bashing out any of the airiness you’ve worked so hard to create.
Once you’ve added all the flour, take your melted butter and very gently pour the yellow liquid round the edge of the bowl. Stop pouring before you pour in the white liquid milk protein – it doesn’t matter if some goes in, so don’t fret too much about it.
Now gently fold the melted butter into the mixture before gently pouring the cake batter into the prepared tin or tins.
Gently slide the tin/s into your oven and bake for 35 – 40 mins (because all ovens are not equal). The cake’s ready when a skewer inserted comes out clean as a whistle. Also note how it’s beginning to come away from the edges of the tin. And while you’re at it, turn off the radio or podcast or music, or loud children, when you take it out of the oven. Listen to it. I love that noise.
Turn the cake/s out onto a wire rack to cool.
Fill with your choice of tasty fillings – my favourite is the traditional combination of creaminess and fruitiness, but if you’re a fan of buttercream, go for it.
Want to make more cakey things? What about a Springtime Apple cake (no idea why it’s particularly suitable for springtime, but who is to question Past Shewolffe?) or if it’s biscuits you’re after, these Langues De Chat are amazing, and use up a spare egg white. Or just browse for yourself here.
No discussion, the beginning of this week was slightly stressful. I spent most of Monday in various NHS waiting rooms (the GP’s surgery, the eye clinic’s outpatient’s in the old hospital, the emergency dept in the new hospital, the CT scan ‘preparation’ area in the new hospital and then finally Sub Wait G1 in the new hospital). But to cut to the chase, everyone is fine, and my Mum’s assertion that “I’m good at falling” remains true.
It may have been stressful, and frustrating and mostly boring (waiting, waiting, forever waiting) but our NHS is remarkable. I hope it can cope with the oncoming onslaught of Covid-19; I fear it has not been well funded for far too many years and the staff are already over-worked and under-resourced. And the staff we met were all kind, caring and competent (apart from one, who was brusque.. but she was efficient and gave us what seemed to be useful information, so I’m not complaining).
The chorus of birdsong was almost deafening the following morning as I walked across to Mum’s house, under low grey clouds, with a slight smirr of rain in the air. Two male blackbirds were singing competitively from the rowan tree. I guess it’s that time of year. Spring is springing, despite the wettest February in memory. Everything still looked grey, or that end-of-winter depressing brown. But if you looked close, there were the tiniest splashes of colour everywhere.
Wee splashes of Spring colour in amongst the brown-grey of last year’s fallen leaves
And then that afternoon our pond seemed to be boiling, the water bubbling up as the frogs got on with their Springtime froggie thing. And of course we now have great globules of frog spawn which will mostly end up as additional protein for the hens I guess.
Our Springtime frog spawn
So, there’s Nature doing its thing, and as sure as night follows day, here am I doing mine, back in the kitchen making treats to cheer our days. And what is more cheering than a wee slice of the most lemoniest of lemony cakes? I adore that zing of sharpness from lemons, and the soft moistness of this sponge complements it perfectly. I guess it would probably keep well, in an airtight tin, but how will I ever know? It’s lovely with a cup of tea or strong espresso, but would work equally well with a scoop of vanilla or dark chocolate icecream, or a big spoonful of creme fraiche on the side for an easy dessert.
1 tsp baking powder (make sure it’s gluten free if you want your cake to be GF)
a pinch of salt
Grease a 23cm / 9″ spring form tin, and line it with baking paper. Preheat the oven to 160C / 325F / GM3.
Cream the butter till pale and soft, using electric beaters.
Add the caster sugar and beat again until light and creamy.
Stir in the ground almonds and vanilla extract.
Add the eggs, one by one, beating thoroughly after each egg.
Fold in the remaining ingredients: lemon zest and juice, polenta, baking powder and salt.
Transfer the mixture into the prepared cake tin and bake for about 50 minutes (but check after 45 to see if it’s ready).
It’s ready when it’s a deep golden colour on top and your skewer comes out clean as a whistle.
Cool on a wire rack
When cool, dredge with sifted icing sugar, to cover any slightly well-fired bits.
The making of lemony polenta cake
My other Spring makes include Wild Garlic Pesto (obviously) and I’m really in the mood for making some chicken liver pate, so I’m delighted that Past-Shewolffe has provided me with a recipe. Or go browse here and see if anything takes your fancy.
Do let me know if there’s anything you want me to make. I’m thinking I might share a few recipes using some of the stockpile in your store cupboard.
When I was wee we called them macaroons, but I’m going with the zeitgeist and will refer to them as macarons. Whatever you call them, they are the most scrumptious light almondy sweetie bonbons you will ever come across.
I always had this idea that macarons were tricky to make, that they wouldn’t rise properly, that they would just be too solid and not light and airy like they should be. Or that they’d be dry and crunchy instead of deliciously softly moist.
So, what changed my world view of macarons? Firstly it’s that I love them, and wanted to be able to make them. But mostly it was getting chickens. And then once we had so many eggs, I started making my own mayonnaise. And once you make your own mayonnaise you have a plentiful supply of egg whites. And I don’t like meringues much, so macarons were the obvious solution.
Don’t you love your life when macarons are the obvious solution!!
Basic macarons
175g icing sugar
125g ground almonds
3 large egg whites
75g caster sugar
To make these properly you need a few bits of kit. For starters, a food processor. You know, the kind that whizzes round and round and chops everything up really fine. You’ll also need a piping bag with a large plain nozzle. And your life will be a whole lot easier if you have either a food mixer too to whisk the egg whites.
Before you start, get your piping bag ready with the right nozzle in place, and prepare your baking tray (I line mine with non sticking baking parchment, but you could use rice paper, or a re-useable silicon mat).
Combine the icing sugar and ground almonds and pop them in the bowl of the food processor. Whizz it briefly. Well not too briefly, get it all a bit more powdery and mixed together
Put the egg whites into a scrupulously clean bowl (any hint of anything greasy and you will have a FAIL), and whisk them until you have soft peaks. Gradually whisk in the caster sugar, and get it all glossy and thick and gorgeous. At this stage I whisked in a few drops of orange essence.
Now get yourself a big metal spoon (or a spatula) and fold half of the sugar/almond mixture into the egg whites. Once they are combined, add the remaining sugar/almonds and fold them in to make a light smooth mixture. Don’t over mix or you’ll lose all the air, but try to get rid of all the lumps.
Spoon the mixture into the piping bag and pipe even sized circles of macarons mixture onto your baking tray.
Turn the oven on: 140C or GM3.
Now leave the tray of uncooked macarons at room temperature for about 15 minutes so the surface dries out ever so slightly.
Bake for 15 minutes, then leave to cool still on the tray.
Macarons out of the oven
Make the chocolate orange filling…
50g good quality dark chocolate
100g unsalted butter, softened
200g icing sugar, sifted
zest of an orange, and some orange juice
Melt the chocolate
Beat the butter, and add the icing sugar and orange zest. Keep beating
Fold in the melted chocolate and mix together
Mix in some orange juice or cointreau if you want an adult version – enough to make the mixture just squidgy enough
You know what to do now.. spoon (or pipe) some chocolate orange filling onto half of the macarons. And pop a second macaron on top of each, to make lovely macarons sandwich. YUMMY.
We get the Sunday Times every weekend. And occasionally the Times on a Saturday too. Last weekend the Times promoted that it had recipes for Bank Holiday baking. So, of course, I didn’t see much of the rest of the paper (apart from the utterly ace column by Caitlin Moran).
The artisanal approach, smooshing gin and white choc icing on top of mini pear cakes
I was kinda sniffy about the Bank Holiday Baking initially. I mean, it’s just the very beginning of May and the first thing I’m being encouraged to bake is Blackberry and Crumble Cake. Now, I’m sure the Blackberry and Crumble Cake is lovely, but brambles are seasonal fruit, and this really is NOT their season. Get real cookery writers! And please stop encouraging supermarkets to stock fruit and veg that is out of season – it is more expensive to produce and ship and probably doesn’t taste as good.
There, rant over.
Then I moved on and spied Pear Cakes with White Chocolate, and Lemon Curd. I had literally just made some lemon curd (in a bid to do something else with our glut of eggs – my girls laid seven in one day earlier this week). And I’d just bought some pears. Yup, I know, pears aren’t in season either. But there they were on the shelf at the farmshop, and they looked delicious. And they store better than brambles, so perhaps it’s not quite so mad to buy them out of season?
Anyway, given that I clearly don’t have a leg to stand on in the ‘seasonal rant stakes’ I’ll move on. The recipes are all from Andrew Dargue of Vanilla Black. I’d never heard of Vanilla Black before, but now I’ve looked at the website, they are ‘Michelin-recommended’ and they have a book coming out this week. So that’ll be why I’ve seen his recipes in various places.
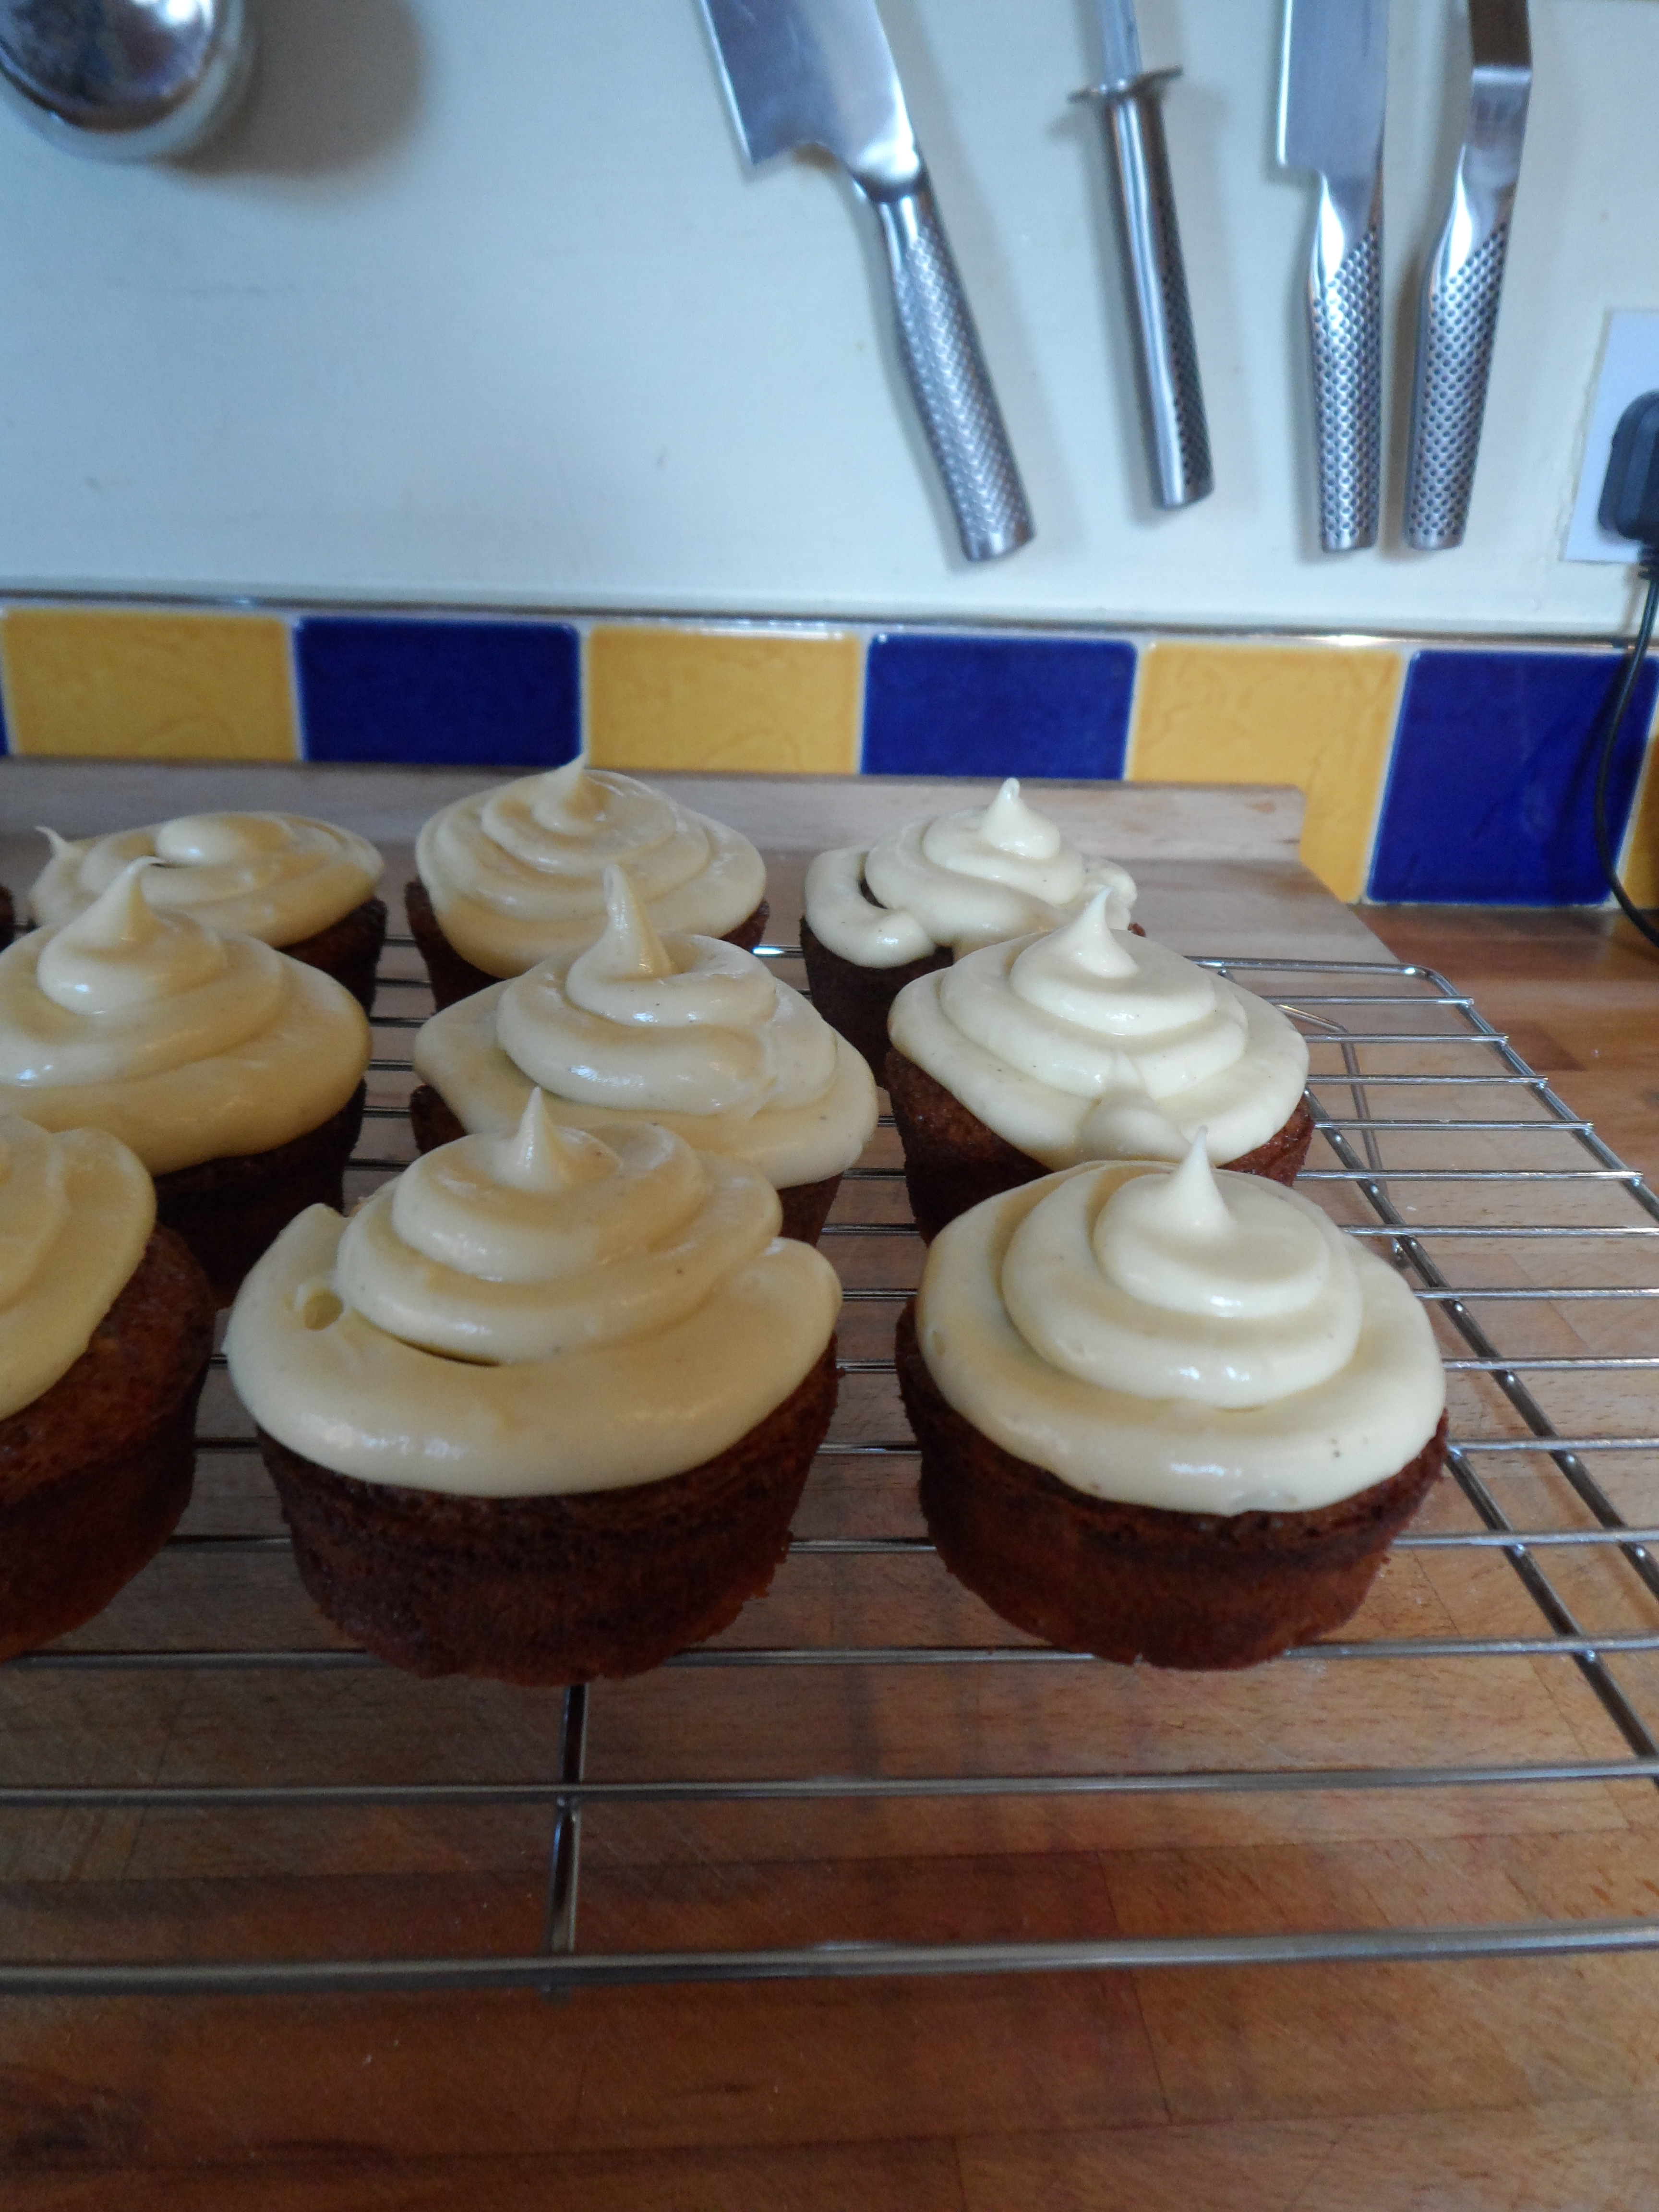
I made the Mini Pear Cakes, complete with white chocolate frosting, but something made me add a slug or two of gin to the frosting. And it was ace.
Mini gin infused pear and white chocolate cakes aka the Boozy Bozzy Fest Cakes
This weekend I made the cakes again, adding some gin to the cake batter too, and took them along for the volunteers at the wonderful Boswell Book Festival. It wasn’t an entirely selfless act, supporting both the literary and volunteering community, for I wanted to see Capt Eric ‘Winkle’ Brown give a talk. He’s the most remarkable man – he has flown more different types of aircraft than any other person, living or dead. And it is unlikely (allegedly) that his record of 487 aircraft will ever be beaten. He also interrogated a number of Hitler’s henchman, including Goering, Messerschmitt and Himmler, and the Commandant of Bergen-Belsen concentration camp. His description of what he witnessed at the camp, in its last few days was incredibly moving – after almost exactly 70 years to the day he still can’t stop smelling the stench of the dying and near dying in that awful place.
But anyway, I digress. These cakes were just going to be called Mini Pear Cakes with Gin and White Chocolate Frosting. yes GIN! But they clearly need to be called the Boozy BozzyFest Cakes instead. They are utterly delish. I’ve adapted the original recipe, but only slightly, so thank you The Times and thank you Andrew Dargue. These rock.
And so long as you use GF baking powder, these are gluten free badboys.
Boozy BozzyFest Mini Cakes
Preheat the oven to 155C / GM3. Grease a large muffin tin – this quantity works well for 12 proper-sized mini cakes. Don’t bother with muffin or cake cases, you don’t need them if you prepare the tin well, with lots of butter to prevent the cakes from sticking.
3 eggs, lightly beaten
125ml sunflower oil
125g light brown sugar
100g buckwheat flour
1/2 tsp baking powder
Pinch of salt
2 small very ripe pears, cut in half and cored
1 TBsp gin
1/2 tsp almond essence (or vanilla, depending on what mood you are in
For the boozy icing
100g white chocolate
100g unsalted butter, softened
50g icing sugar, sifted
1 TBsp gin
Whisk the eggs, sugar and oil in a large bowl
Add the flour, baking powder and salt, and mix well together
Add the gin and essence
Using a large grater, grate the pears into the mixture. This should be possible if you hold onto the skin side, and just grate the flesh – you should be left holding the skin, with all the flesh grated into the cake batter
Mix again, but only lightly to combine everything
The batter is pretty runny, but don’t worry – it’ll work out. Spoon the mixture into the prepared muffin tin, filling each hole about two thirds of the way to the top.
Bake for around 20-25 minutes, or until firm to the touch.
Leave to cool for 10 minutes or so in the tin, then use a knife to run around the rim of each cake to loose them from the tin, and turn out onto a wire rack to finish cooling.
For the icing: melt the chocolate in a microwave on the lowest power setting, or in a bowl over a pan of hot water.
Beat the butter and icing sugar together. Add the gin.
Fold in the melted chocolate until well combined
Smoosh the icing on to each cake or if you want to be a bit posher, pipe it on (it’ll look smart but not too twee if you use a plain round piping nozzle).
I’m one of those people who likes their sweets to be slightly salty.
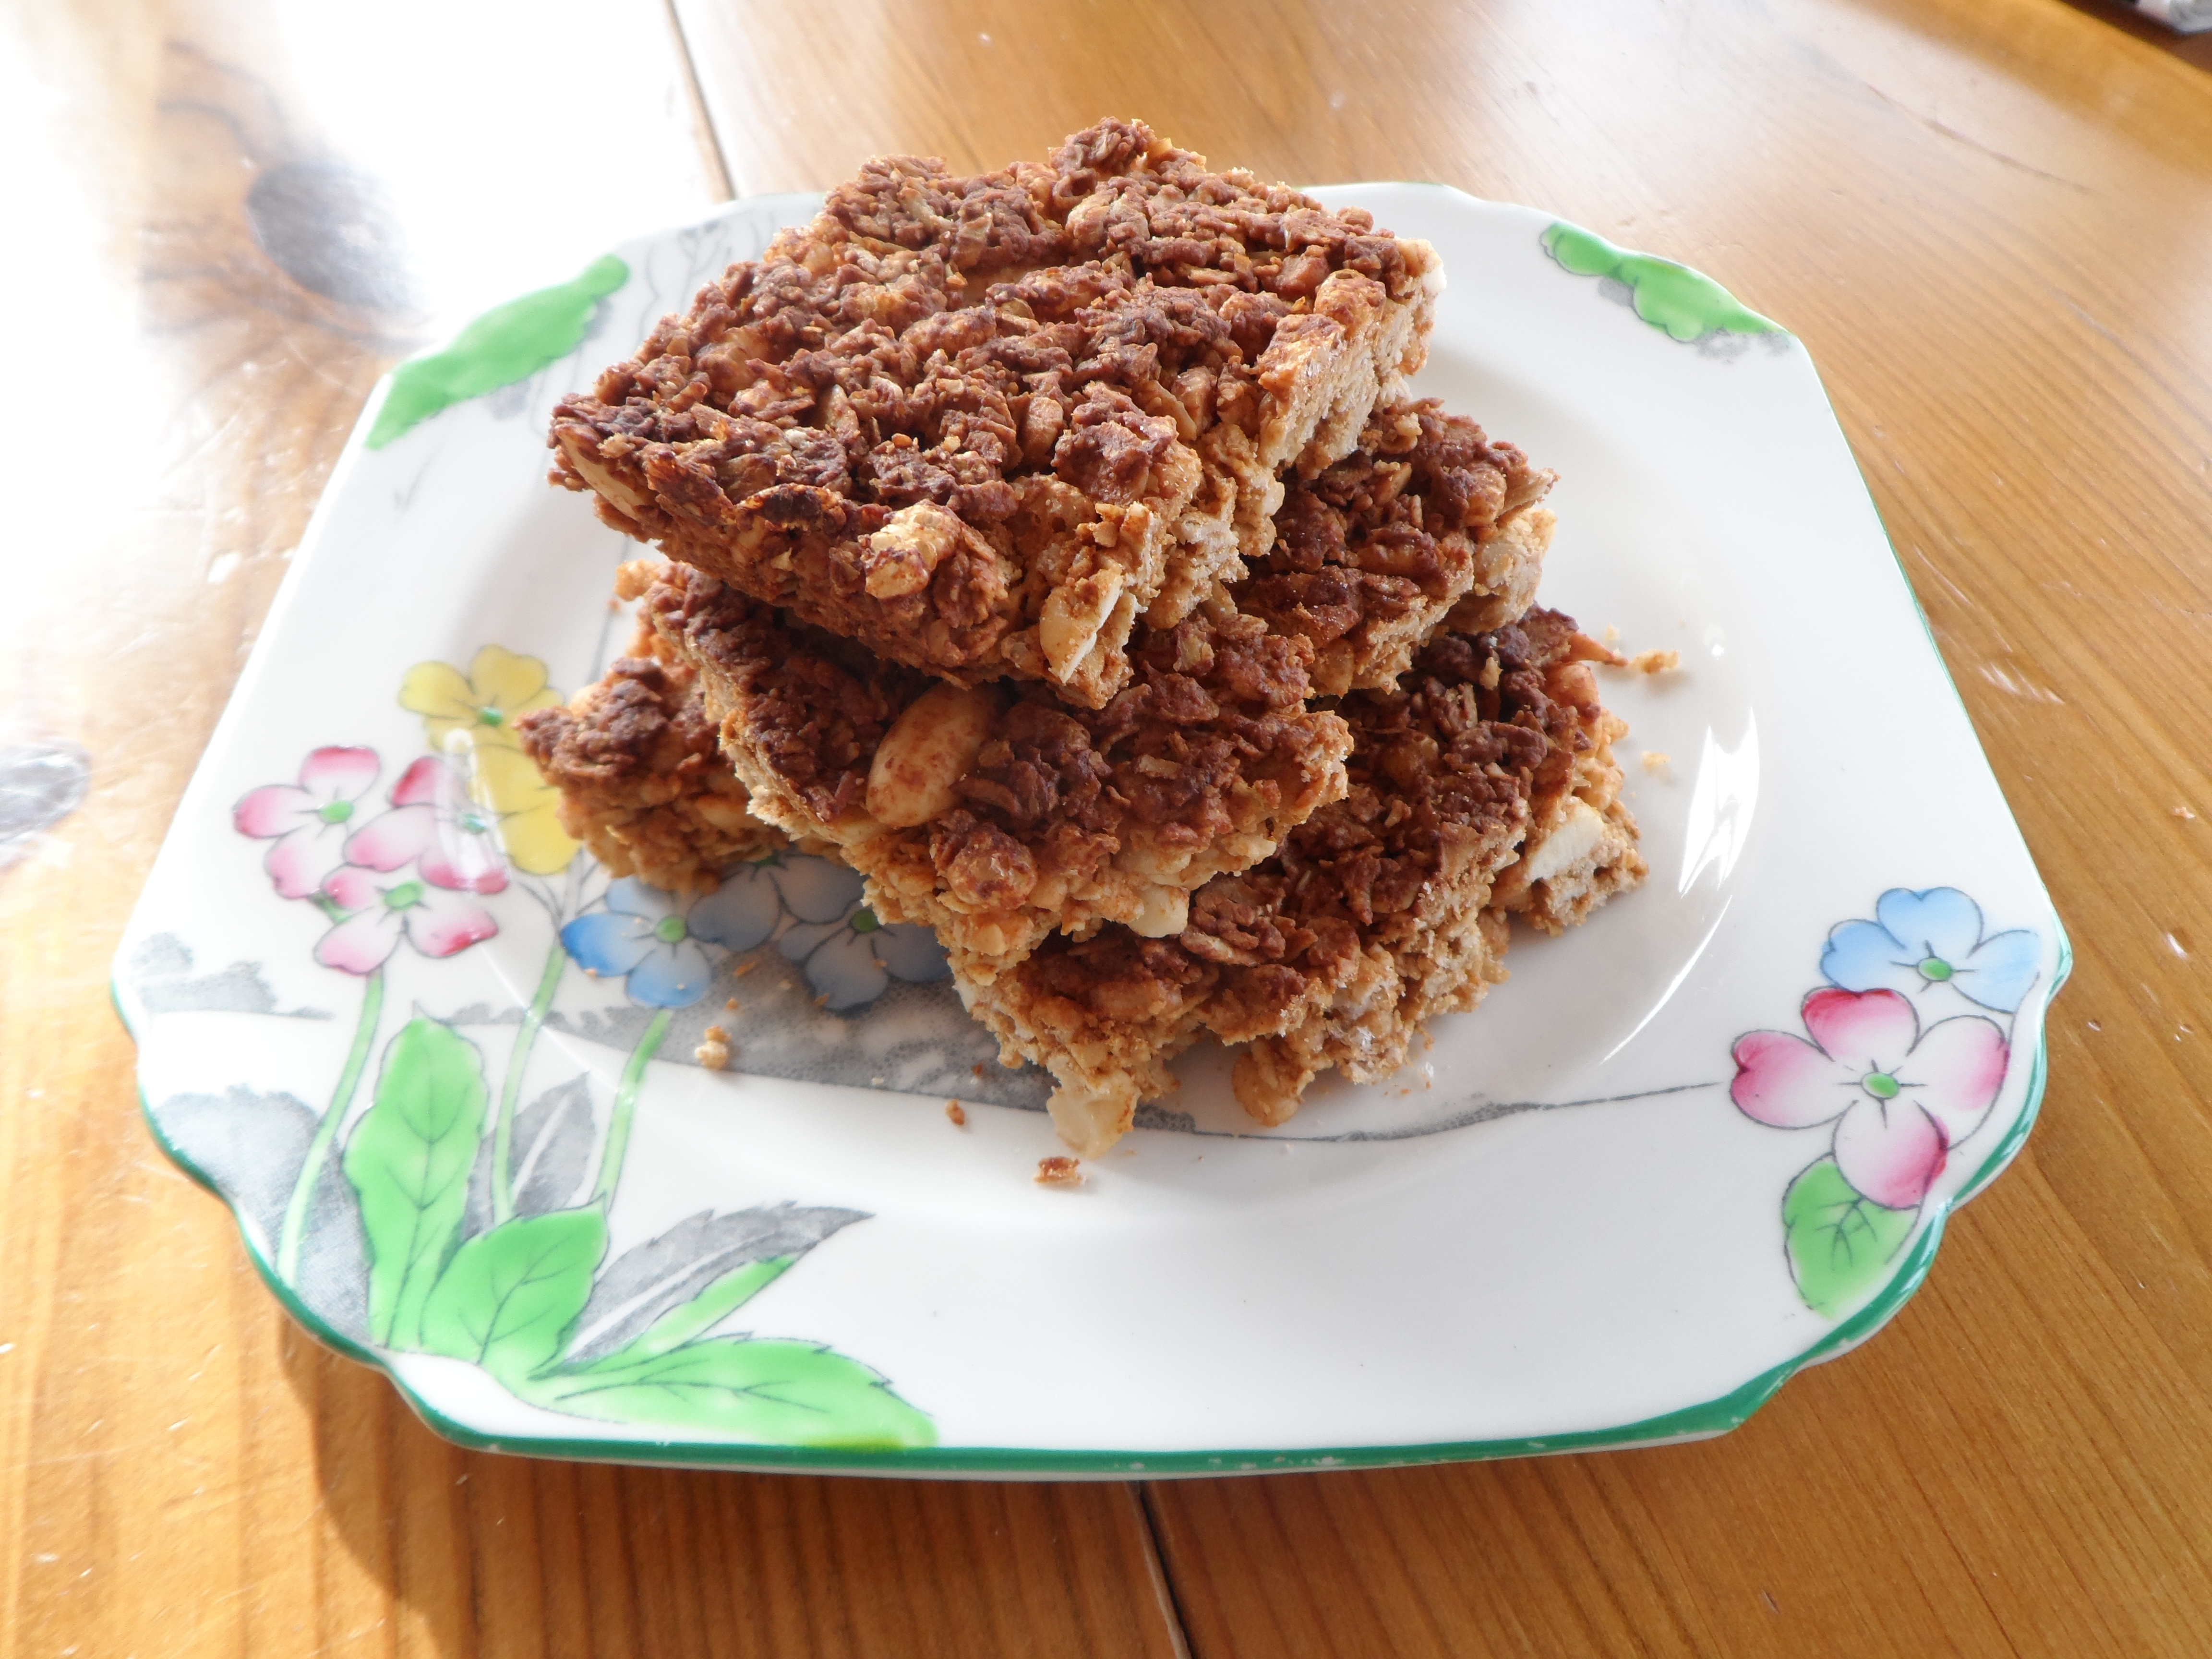
Tasty homemade snack bars
I don’t cook with a lot of salt, preferring to use herbs and spices. I’ve bought into the ‘fact’ that too much salt is bad for you. However, there was a credible article in the Sunday Times the other week, highlighting new evidence which showed that the low sodium diet was as damaging as the high sodium one. My father has always just tipped the salt pot upside down and sprinkled it liberally over his plate, often then creating a small salt mountain on the side of the plate to dip forkfuls of food into. He’ll be 95 in a couple of months, so his super-high salt diet hasn’t exactly limited his life too much.
Anyway, although I like my sweets salty, I’m less keen on my savoury dishes being too sweet. I’m not a big fan of putting fruit into a stew or casserole. My exception is good redcurrant or rowan jelly with a roast meat. Or a not-too-sweet apple sauce with roast pork.
But back to the salty sweetness. When I was in the US last year, with a work colleague, we discovered Nature Valley’s Sweet and Salty Nut Granola Bars. It was love at first bite for me. They aren’t available here in the UK, although there’s a huge variety of similar products. But I can’t be trusted in a sweet shop, so have to confess I haven’t tried terribly hard to find a suitable substitute.
I hadn’t thought of making my own. Why hadn’t I? I must be entirely mad.
Anyway, once the thought came to me, I flicked through all my recipe books and scoured the internet for the perfect sweet and salty crunchy nutty bars. And then I adapted. This isn’t entirely true. I can’t lie. What really happened is that I came across a recipe on Half Baked Harvest’s blog and decided it was time to get experimenting. This recipe is adapted from hers. It is the perfect crunchy, sweet, salty, nutty snack. But it’s not as healthy as eating an apple, so although they are addictive, try to ration them.
Crunchtastic sweet and salty nutty bars
250g / 3 cups porridge oats
35g / 1 cup rice krispies (or any puffed rice cereal)
40g / 1/4 cup roasted salted nuts (peanuts is fine, but mixed nuts would work just as well)
a pinch of salt
1/2 tsp bicarbonate of soda
125g honey
130g peanut butter
30g butter or coconut oil (I prefer to use coconut oil these days)
1 tsp vanilla extract
Preheat oven to 350F or GM4. Line a 9″ x 13″ baking tray with greaseproof paper. Leave an overhang of paper over one long side of the tin (to make it easier to remove the bars later)
Mix porridge oats, krispies, nuts, salt, and bicarb of soda in a large mixing bowl. Make a well in the centre
Put the honey, peanut butter and butter (or coconut oil) in a small pan and warm gently till all the ingredients are melted
Add the vanilla
Stir the melted ingredients till they are all combined into a sweet and goopy sauce
Pour all this melted mixture into the well in the centre of the dry ingreds.
Stir well to combine it all together. Try to make sure there are no dry bits left in the bowl
Pour this into the prepared tin. Get a big metal spoon (or a metal measuring cup) and lightly oil the back of it, then use this to press all the mixture down into the tin
Put in the oven and bake for about 20 mins, or until golden brown. Watch out, it can go from perfect to ‘slightly burnt’ quite quickly.
When you take it out of the oven, try to slide the whole lot out of the tray onto a heatproof surface, and then walk away from it for at least half an hour. (I’m only telling you to do this so that you don’t end up trying to cut the bars when they are still in your baking tray, and you end up ruining your tray, with knife scores across it)
Once it is cool, try to cut it into pieces. You’ll need a sharp knife, and some of it might crumble a bit. Any extra crumbs left, pour into an airtight pot and use for sprinkling over yoghurt, or ice cream or in a crumble.
Keep the bars in an airtight tin, for as long as possible. You may need to put them on a very high shelf, out of your reach. Or to give them to friends.
Suggested adaptations – you could add dark chocolate chips, or dried fruit (cranberries, chopped up apricots, raisins). Or desiccated coconut. Or, cinnamon would be nice, Or chopped dried apples, with some cinnamon, a pinch of cloves and some ginger. You could probably replace the honey with agave syrup, or golden syrup, although I’m not sure why you’d want to do that.
And apologies if you don’t have digital weighing scales. I was old-school for YEARS, but bought a digital set recently (so I could weigh out my 7g of yeast to make home made bread) and it has entirely changed how I bake. Just pop the bowl on the scales and add the next ingredient. Easy peasy. They’re not expensive and take up hardly any room in your cupboard. Isn’t it time to treat yourself?
Want to find more of my recipes? Take a look here: Shewolffe’s Recipes. If you like this, you’ll probably like my salty nut brittle, but go see what else is in there.
The first record I bought was Abba’s Arrival. The second was Blondie’s Parallel Lines. I was a little in love with Debbie Harry. Weren’t we all?
Blondie has stood the test of time. But these days Blondie is less of an aural treat and more of an oral one for me. I have at last discovered the Blondie (as opposed to the Brownie). It’s a squishy tray bake, like a chocolate brownie, but with a caramelly buttery flavour, almost like butterscotch. And of course the regular blondie can be pimped up, by adding all manner of bling. In this recipe I’ve added dark choc chips, brazil nuts, ginger and dried sour cherries. And they rock.
Pimped up blondies
100g butter, melted
150g dark muscovado sugar, bashed to get rid of all the lumps (or use a soft brown or light muscovado sugar)
1 large egg
1 tsp vanilla extract
140g plain flour
1/2 tsp baking powder
1/4 tsp bicarb of soda
1/2 tsp ground ginger
pinch of salt
50g crystallised ginger, chopped into wee nibs
50g dark chocolate, chopped into wee nibs
a handful of brazil nuts, chopped
a handful of dried sour cherries (or cranberries)
Grease and line an 8″ square baking tray. Pre-heat oven to GM5.
Mix together the flour, baking powder, baking soda, ginger and salt. Leave to one side.
In another bowl, whisk together the sugar and melted butter – this is easiest with an electric beater. Don’t worry if it’s still a bit bumpy and grainy.
Add the egg and vanilla and keep beating – it’ll change colour to a much lighter tan and will become fluffy and almost moussy.
With a large metal spoon stir the flour mix into the buttery mix. Fold it in, without beating, or you will lose the lightness of the mix.
Add the ginger, nuts, chocolate and cherries (or whatever you are pimping the mix with) and stir through.
The mix will be relatively thick. Spoon it onto the baking tray, and spread it out.
Bake for about 25 minutes, until the blondies are smelling too good to leave for a minute more, and they look golden brown.
Remove from oven and cool for about 20 mins before removing from tray and cutting into slices.
Perfect with an afternoon coffee. A proper real strong coffee.
Other ways to pimp your blondies:
Add smarties or M n Ms
Add any dried fruit
Try salted nuts if you enjoy that sweet-salt hit
Gobs of peanut butter stirred through once the mix is in the tray
Coconut
Chopped up mint toffees
Oh, just raid your cupboard, or the sweetie drawer (what you don’t have a sweetie drawer?) and see what inspires you
Is salted caramel still on trend? A couple of years ago it seemed to be everywhere. And I was happy. I love that combination of sweetness and saltiness. I adore peanut butter, adore it even more on hot buttered toast with marmite. Or incorporated into a sweet with chocolate and a biscuit base.
So, a simple salty, nutty caramel brittle is pretty much the perfect sweet to make. And it turns out it was pretty much the perfect home-made Christmas present to give to nephews too! (Although obviously not for you, if your nephews have nut allergies).
Salty nut brittle
340g mixed nuts, preferably not salted. The type of nuts doesn’t really matter, but why not buy a bag of peanuts, of brazil nuts and pecans. Or hazelnuts, and macadamia and almonds. Whatever you prefer.
400g sugar. Ordinary granulated sugar is fine, or you could use caster, or golden caster
120mls water
100g unsalted butter
100g golden syrup
1/2 tsp bicarbonate of soda
Maldon sea salt (there are other brands, but please use a good quality salt in flakes, not ordinary table salt)
Preheat oven to 350F / 180C / GM 4
Spread the nuts onto a big baking tray, as big as you’ve got – you’re aiming to get them into a single layer, if possible
Roast the nuts in the oven for about 8 minutes, give or take. You’re looking for a golden browniness, not burnt.. and there’s a relatively short window of opportunity between the two. To make it easier in a minute or two, pour the nuts onto a large sheet of greaseproof paper or kitchen foil, or a bowl (this is so that you can QUICKLY pour them from whatever receptacle they are in, into a pan of hot hot hot caramel later on). While you’re at it, get another sheet of greaseproof paper, and line the baking tray with it, and leave to one side. You’ll need it soon.
Now put the sugar, water, butter and golden syrup into a heavy based saucepan, and gently heat, stirring till the butter is melted and the sugar has all dissolved.
Pop a sugar thermometer into the pan, and leave it in there while the mixture heats up to the boil. Keep it boiling, and stir occasionally if you can’t stop yourself
Keep an eye on that sugar thermometer, and as soon as it reaches 150C (which incidentally is between ‘soft crack’ and ‘crack’ on my thermometer) take it off the heat, and quickly stir in the bicarbonate of soda.
It should all swoosh up a wee bit which is exactly what you want it to do. Work quickly – pour in the nuts and stir them in. And then pour the whole lot out onto a baking sheet, with a piece of greaseproof paper on it
Use the back of a spoon to spread the mixture nice and thinly … but not TOO thin
Sprinkle generously with sea salt flakes
And now walk away for a while. Leave it be. Come back when it’s cool
Break it up with your hands and store in an airtight container. Then hide it somewhere you can’t reach, just to save yourself from eating more than you really should
I popped great big shards of this into kilner jars as Christmas present this year, and they went down a treat. If the shards had been smaller, I might have considered dipping them in chocolate to add to the sugar-salt-nut treatiness. It wasn’t required, but just imagine it enrobed with lush dark chocolate. Mmm.